This is the 6th post of series "Import Spine Animation in Cocos2d-x". Before taking a look on this post, please refer to the first post to create a worm sprite: Part 1; Part 2, Part 3,
Part 4,
Part 5.
In this part 6, I continue showing you to create the animation in Spine 2D Animation. After this post, I believe that you will understand how to create bones, rename them and set the key-frame for them. Here we go!
Step 1: In the "Tool" at the bottom, select "Create" option to create bones.
 |
| Fig 1. Select "Create" option. |
Step 2: Move the mouse pointer to the position of the head like screen shot below and then click to create the root bone (the blue cross).
 |
| Fig 2. Move pointer to create root bone. |
Step 3: Then drag the pointer from right side to left to create the head bone.
 |
| Fig 3. Drag mouse to left side to create head bone. |
Step 4: Make the same for the body parts.
 |
| Fig 4. Drag to right to make the bones for the other parts. |
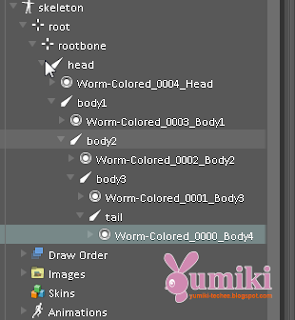
Step 5: Rename the bone in Hierarchy panel like screen shot below:
 |
| Fig 5. Rename bones. |
Step 6: Drag each image in "root" node to appropriate bone
 |
| Fig 6. Drag images to the bones. |
If you go to this step, it means you are all set to create animation,
Step 7: Click on the "SETUP" to toggle to Animation mode.
 |
| Fig 7. Click "SETUP" to switch to Animation mode. |
Step 8: Select "Pose" option in "Tools" panel at the bottom of screen. This "Pose" option will help you to select all bones in Working Area.
 |
| Fig 8. Select "Pose" option. |
Step 9: Select all bones in Working Area by dragging the mouse pointer to select all.
 |
| Fig 9. Select all bones. |
Step 10: Select the "Key" buttons to Red to record the state of bones.
 |
| Fig 10. Select the keys to record the state of all bones. |
Now, you will see in the "Dopesheet", there is a red round point in the key-frame 0. In the next post, I will continue make the bones move to create animation.
If you have any questions or concerns, please post your comments here, I will take a look and response ASAP.
Yumiki.


No comments :
Post a Comment